Overview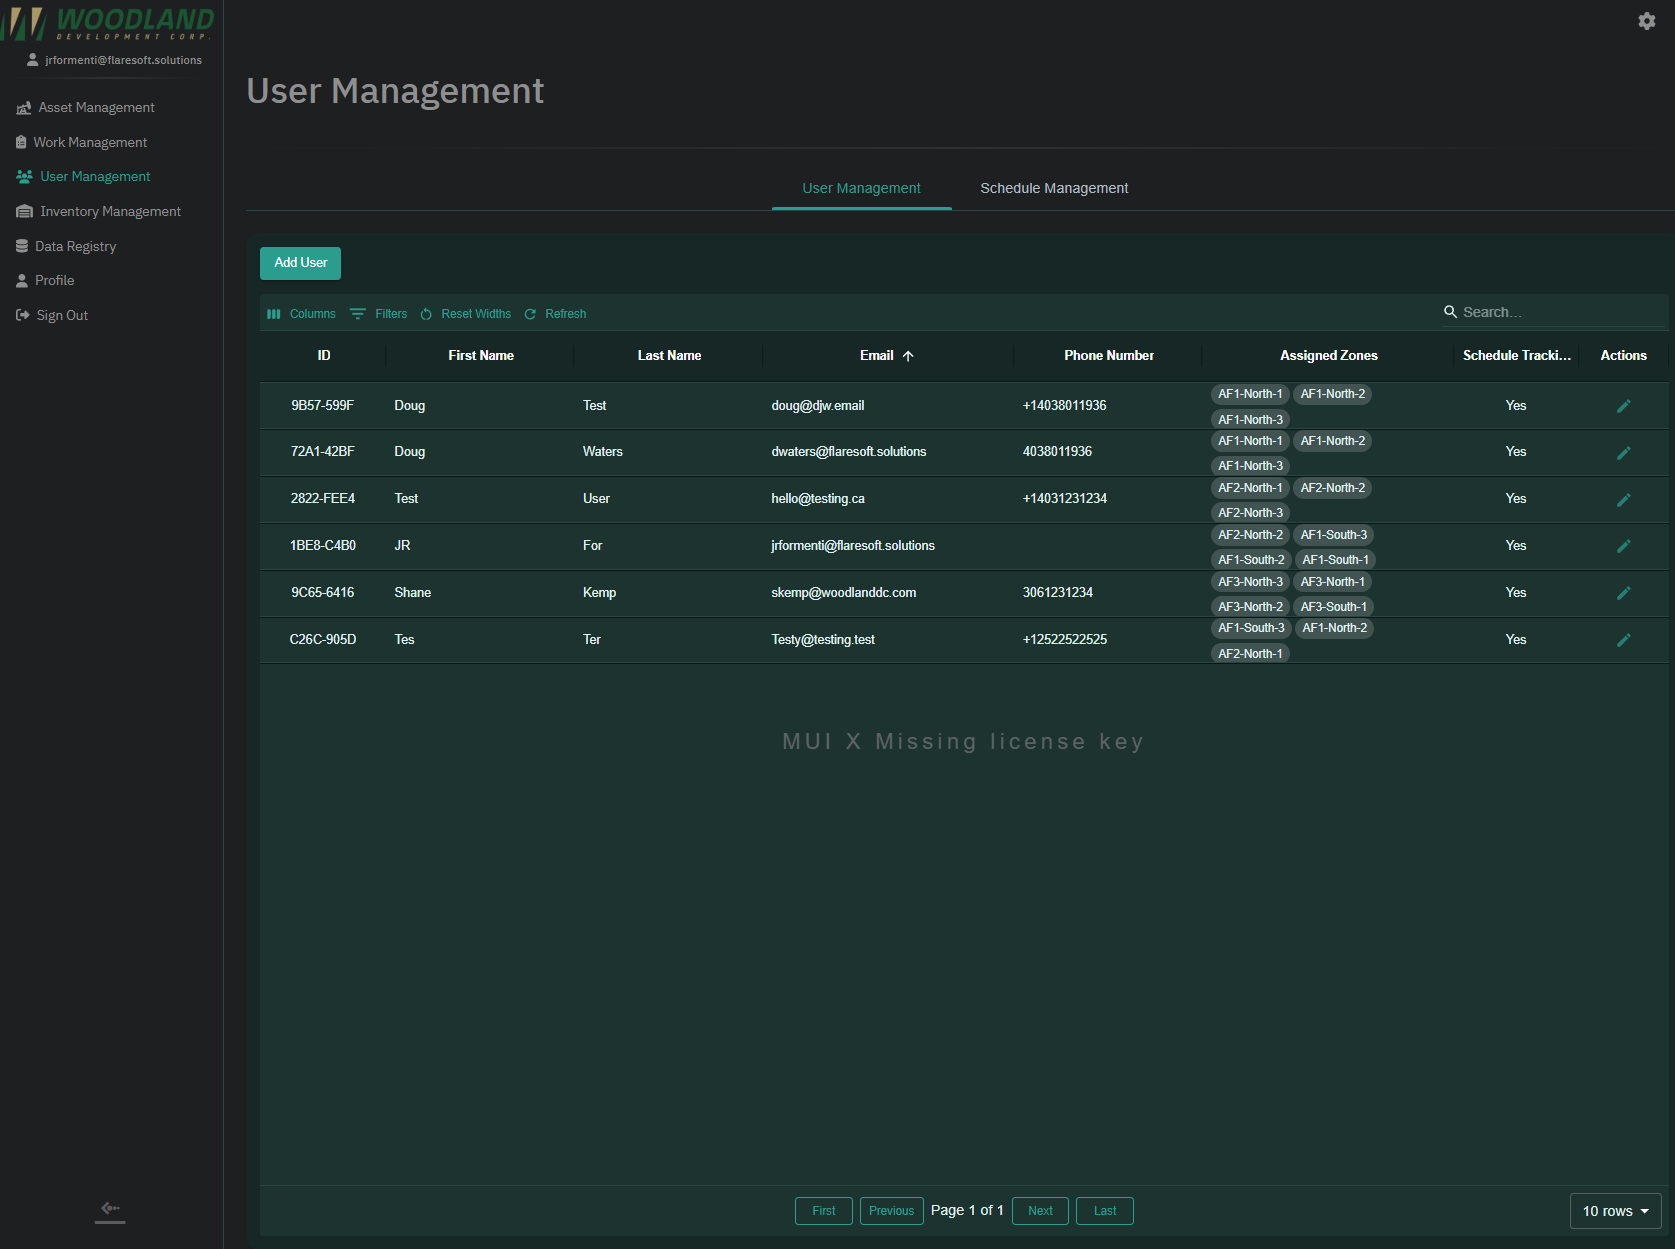
The User Management section provides administrators with tools to manage users, their assigned zones, and access privileges. This is a critical area for ensuring that the right people have access to the appropriate resources.
Key Features
User Table:
- Displays a list of all users with the following information:
- ID: Unique identifier for each user.
- First Name and Last Name: Personal information of the user.
- Email: User’s email address.
- Phone Number: Contact number (optional).
- Assigned Zones: Operational zones associated with the user.
- Schedule Tracking: Indicates whether the user is enabled for schedule tracking (Yes/No).
- Includes sorting, filtering, and column customization options.
- Displays a list of all users with the following information:
Action Bar:
- Located above the table, it includes:
- Add User: Opens a form to create a new user.
- Columns: Customize visible columns in the table.
- Filters: Apply specific criteria to narrow down the user list.
- Reset Widths: Reset column widths to their default sizes.
- Refresh: Reload the table to view the latest updates.
- Located above the table, it includes:
Action Column:
- Edit (Pencil Icon): Opens the user’s details for editing.
Global Search:
- Use the search bar to find users by their name, email, or assigned zones.
Pagination Controls:
- Navigate through pages and adjust the number of rows displayed per page.
Add New User
The Add User feature allows administrators to add new team members to the system.
How to Add a User
- Click the Add User button in the top action bar.
- Fill out the required fields in the form:

- Email Address (Required): Enter the user’s email address.
- First Name and Last Name (Required): Provide the user’s full name.
- Phone Number: Optionally, add a contact number for the user.
- Assigned Zones: Select one or more zones that the user will manage.
- Schedule Tracking (Required): Indicate whether the user is enabled for schedule tracking.
- Use the following buttons:
- Add User: Save the new user to the system.
- Clear Form: Reset all fields to default.
- Cancel: Exit the form without saving any changes.
Editing a User
- Click the Pencil Icon in the Actions Column next to the user you want to edit.
- Update the desired fields in the form, including their assigned zones and schedule tracking status.
- Save changes or cancel to discard updates.
Tips for Effective User Management
- Assign appropriate zones to users based on their responsibilities.
- Use the Schedule Tracking option for users who need to monitor or manage schedules actively.
- Regularly review and update user information to ensure accuracy.
Was this article helpful?
That’s Great!
Thank you for your feedback
Sorry! We couldn't be helpful
Thank you for your feedback
Feedback sent
We appreciate your effort and will try to fix the article